


Introduction
Testing is an important part of coding and in recent years testing has become more popular on the frontend side. Some efforts have been made to make writing tests more approachable to front-end developers, like creating more developer-friendly libraries to code and run tests.
The most used has been Jest, as a test runner, and Testing Library, a library that comes with utilities for querying the DOM in a similar way the user would normally do, like finding elements by their role or text. So Testing Library encourages you to write your tests to resemble the way a user will use your application.
Both libraries are used in conjunction to run and query the DOM nodes, respectively.
Briefly, it works like that:
- Render the React component(s);
- Find (query) the element you want to test by its role (recommended), its text, or its id;
- Run (expect), the elements found in the previous step, against an assertion;
Disclaimer: There are several ways of writing a test solution, my approach is just one of those ways and does not necessarily correspond to the best one.
We're going to use Create React App to bootstrap our React application because it comes with Jest and React Testing Library already set. So:
npx create-react-app todo
We'll need to upgrade the user-event package of the Testing Library as the version that comes baked in CRA is outdated. So:
npm i @testing-library/user-event@latest
And below is an animation of the fully functioning todo app. Just to showcase what a todo app is for those who aren't familiar with it. Sorry, I know the UI isn't the best, I just needed an example to kickstart.
Here are the functional requirements of our simple todo app:
- At first, the app should render a heading, a blank input, and a button. The button element is expected to be disabled;
- Once the application loads, the focus should be on the input;
- The user should be able to type in the input field;
- The submit button becomes clickable (enable) once we start typing in the input field;
- The app should disable the button once the input field is empty again;
- The app should clear the input once the user clicks the submit button;
- he app should list the submitted todos;
- The user should be able to delete a todo by clicking on its delete button;
Trust me, it really helps create a checklist of what or how the app should behave when it comes to testing. We're going to cover each one by writing its tests to make sure all the requirements are met. But first, let's code or todo app.
React Components
As the tutorial is about testing, I'll be just dropping the JSX markup of each React component we're going to be writing tests.
If you want to code along with me, make sure to follow this file structure to not have problems with the file imports:
.
└── src/
    ├── TodoList/
    │   ├── index.js
    │   ├── index.test.js
    │   └── TodoItem/
    │       ├── index.js
    │       └── index.test.js
    └── App.js
App.js
import "./App.css";
import TodoList from "./components/TodoList";

function App() {
  return (
    <div className="App">
      <TodoList />
    </div>
  );
}

export default App;
TodoList.js
import { useState } from "react";
import TodoItem from "./TodoItem";

function TodoList() {
  const [todos, setTodos] = useState([]);
  const [todo, setTodo] = useState({
    id: "",
    text: "",
  });

  const [isValid, setIsValid] = useState(false);

  function handleNewTodo(e) {
    setTodo({
      id: Math.random(),
      text: e.target.value,
    });

    if (e.target.value.trim()) {
      setIsValid(true);
    } else {
      setIsValid(false);
    }
  }

  function handleDeleteTodo(id) {
    const newTodos = todos.filter((todo) => todo.id !== id);
    setTodos(newTodos);
  }

  function submitNewTodo(e) {
    e.preventDefault();

    setTodos([...todos, todo]);
    setTodo({
      id: "",
      text: "",
    });
    setIsValid(false);
  }

  return (
    <div>
      <h1>todos</h1>
      <form onSubmit={submitNewTodo}>
        <label htmlFor="todo">todo</label>
        <input
          type="text"
          id="todo"
          autoFocus
          placeholder="type in your todo"
          autoComplete="off"
          value={todo.text}
          onChange={(e) => handleNewTodo(e)}
        />
        <button
          className="form_buttonSubmit"
          type="submit"
          disabled={!isValid}
        >
          submit
        </button>
      </form>
      <ul className="todos">
        {todos.map((todo) => (
          <TodoItem
            key={todo.id}
            {...todo}
            handleDeleteTodo={handleDeleteTodo}
          />
        ))}
      </ul>
    </div>
  );
}

export default TodoList;
TodoItem.js
function TodoItem({ handleDeleteTodo, ...todo }) {
  return (
    <li className="todo">
      <span>{todo.text}</span>
      <button
        className="todo_buttonDelete"
        onClick={() => handleDeleteTodo(todo.id)}
      >
        delete
      </button>
    </li>
  );
}

export default TodoItem;
Writing the tests
TodoList component
At the very top of the file, remember to import the package libraries and the component we will render.
import { render, screen } from "@testing-library/react";
import user from "@testing-library/user-event";
import TodoList from ".";
Before each code snippet, I'll be rewriting our requirements to exactly target what we're testing.
- At first, the app should render a heading, a blank input, and a button. The button element is expected to be disabled;
- Once the application loads, the focus should be on the input;
test("should render correctly", () => {
    render(<TodoList />);
    // <h1>todos</h1>
    const headingElement = screen.getByRole("heading", { level: 1 });
    // <input />
    const inputElement = screen.getByRole("textbox", { name: "todo" });
    // <button />
    const buttonElement = screen.getByRole("button", { name: "submit" });

    expect(headingElement).toBeInTheDocument();
    expect(inputElement).toBeInTheDocument();
    expect(inputElement).toHaveValue("");
    expect(inputElement).toHaveFocus();
    expect(buttonElement).toBeInTheDocument();
    expect(buttonElement).toBeDisabled();
  });
- The user should be able to type in the input field;
- The submit button becomes clickable (enable) once we start typing in the input field;
test("should enable the button once the input field has a value", async () => {
    user.setup();
    render(<TodoList />);

    const inputElement = screen.getByRole("textbox", { name: "todo" });
    const buttonElement = screen.getByRole("button", { name: "submit" });

    await user.type(inputElement, "walk the cat"); // await user to type "walk the cat" in the input field

    expect(inputElement).toHaveValue("walk the cat");
    expect(buttonElement).toBeEnabled();
  });
As you can see above, we write this test by first querying the input and the button by their role, textbox, and button respectively. Then simulate the action of the user input with the user.type() method and finally, expect the input to have the same value we simulated and the button to be enabled.
Also, notice the callback function must be async because the action of typing involves a changing state of the input value.
- The app should disable the button once the input field is empty again;
test("should disable the button once the input field is empty", async () => {
    user.setup();
    render(<TodoList />);

    const inputElement = screen.getByRole("textbox", { name: "todo" });
    const buttonElement = screen.getByRole("button", { name: "submit" });

    await user.type(inputElement, "walk the cat");

    expect(buttonElement).toBeEnabled();

    await user.clear(inputElement);
    expect(buttonElement).toBeDisabled();
  });
- The app should clear the input once the user clicks the submit button;
test("should clear the input value once the submit button is clicked", async () => {
    user.setup();
    render(<TodoList />);

    const inputElement = screen.getByRole("textbox", { name: "todo" });
    const buttonElement = screen.getByRole("button", { name: "submit" });

    await user.type(inputElement, "walk the cat");
    await user.click(buttonElement);

    expect(inputElement).toHaveValue("");
  });
Nothing is much different from what we've been doing until here, we query the desired DOM nodes and simulate the user actions of typing and clicking the button. At last, we expect the input value to be an empty string;
- The app should list the submitted todos;
test("should list the todos submited", async () => {
    user.setup();
    render(<TodoList />);

    const inputElement = screen.getByRole("textbox", { name: "todo" });
    const buttonElement = screen.getByRole("button", { name: "submit" });

    await user.type(inputElement, "walk the cat");
    await user.click(buttonElement);

    await user.type(inputElement, "walk the dog");
    await user.click(buttonElement);

    const todos = screen.getAllByRole("listitem");

    expect(todos[0]).toHaveTextContent("walk the cat");
    expect(todos[1]).toHaveTextContent("walk the dog");
    expect(todos).toHaveLength(2);
  });
Here things got a little more interesting. As we added two list items by simulating both user interactions with user.type() and user.click(), we expect to get two list items, so when querying for those we must use the variant getAllByRole() and that will return an array with all list item Testing Library could found. Finally, we expect this array to have the exact same length of items we added.
- The user should be able to delete a todo by clicking on its delete button;
test("should remove a todo when its delete button is clicked", async () => {
    user.setup();
    render(<TodoList />);

    const inputElement = screen.getByRole("textbox", { name: "todo" });
    const buttonElement = screen.getByRole("button", { name: "submit" });

    await user.type(inputElement, "walk the cat");
    await user.click(buttonElement);

    const todo = screen.getByRole("listitem");

    const deleteButtonElement = screen.getByRole("button", { name: "delete" });
    await user.click(deleteButtonElement);

    expect(todo).not.toBeInTheDocument();
  });
Until here we're done with testing because we already made sure the app is fully functioning and met all the listed requirements, so the tests written below are essentially testing the same behavior as we did with the TodoList component. Remember, when we tested the TodoList (parent) component, we ended up testing the TodoItem (child) component in a way as well, but it doesn't hurt to test from a child perspective 😀.
TodoItem component (Optional)
As the first test suite above, remember to import the package libraries, and the component we will render, and mock the prop the component should get at the very top of the file.
import { render, screen } from "@testing-library/react";
import user from "@testing-library/user-event";

import TodoItem from ".";

const todo = {
  id: Math.random(),
  text: "Go to the gym",
};
- The component should render a list item with the content we passed into its props;
- The component should render a button with the name 'delete' attached to it;
test("should render correctly", () => {
    const handleDeleteTodo = jest.fn();
    render(<TodoItem {...todo} handleDeleteTodo={handleDeleteTodo} />);

    const todoItem = screen.getByRole("listitem");
    const deleteButton = screen.getByRole("button", { name: "delete" });

    expect(todoItem).toHaveTextContent("Go to the gym");
    expect(deleteButton).toBeInTheDocument();
  });
Look how we mock the handleDeleteTodo() function, the test doesn't need to know its implementation.
- The component should call the function it gets from its props once the delete button is clicked;
test("should call the handleDeleteTodo when the delete button is clicked", async () => {
    user.setup();
    const handleDeleteTodo = jest.fn();
    render(<TodoItem {...todo} handleDeleteTodo={handleDeleteTodo} />);

    const deleteButton = screen.getByRole("button", { name: "delete" });

    await user.click(deleteButton);
    expect(handleDeleteTodo).toHaveBeenCalled();
    /* expect(handleDeleteTodo).toHaveBeenCalledWith(todo.id); */
  });
As clicking a button is a user interaction, we must wait for this action to happen and the callback function should be async.
Notice the last commented line, it's just there to showcase we could make the assertion with another matcher by making sure the function is called and is called with the right parameter.
Running the tests
To run the tests simply type in the terminal:
npm run test
test is a node script already set up in the package.json file. You should get something like this:
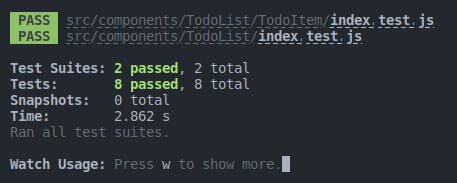
Running with coverage report
A coverage report is a feature from Jest that let us know how much our written tests cover the lines of the file we're testing. It prints a table on the terminal and also generates an HTML file with the report. Although it gives us some direction about our tests, a solid 100% coverage report isn't always what we're seeking. So to print the coverage report, we simply add the coverage flag.
npm run test -- --coverage
After running, this is what you see:

Notice the new folder added to the root of your project. There you can find the generated HTML reports:
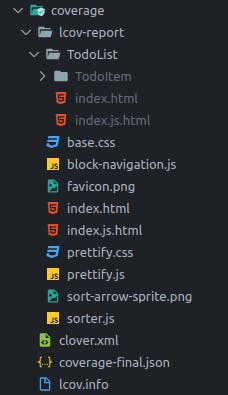
To finish I would also recommend wrapping the test blocks in a describe block, something like this:
describe("<Component />", () => {
  test("...", () => {
    render(<Component />)
     ....
  });

test("...", () => {
    render(<Component />)
     ...
  });
 ...
});
That's all for this article, I hope you have learned something new!